Disk Erase
KillDisk is a powerful tool for disk sanitation. Individual disks or group of disks (Batches) can be erased with just few clicks using many international sanitizing standards.
Disk Erase complete process is described below.
-
Select disks
Use mouse in Disk Explorer to select one or more physical disks. Selected disks displayed with orange borders.
For multiple selection use Ctrl+Left Mouse click.
To select all disks in a row, click particular numbered row header.
To select all disks in a column, click particular numbered column header.
To select all attached disks, press Ctrl+A.
Another way to select all disks is to click a rectangle at the top-left corner of the Disk Bays view.
Figure 1: Multiple Disk Selection 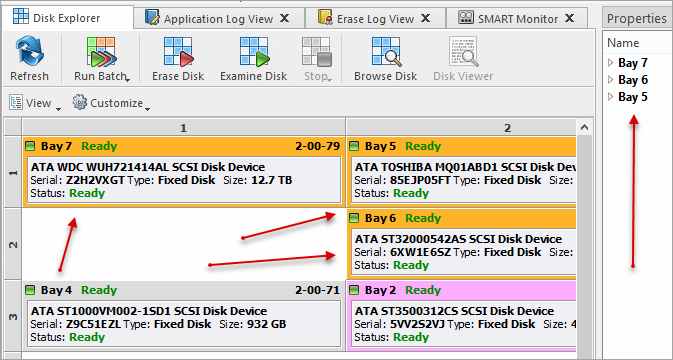
To select a particular partition or volume, click the object in the Local Devices view.
-
Confirm erase options
Confirm sanitation options after Disk Erase dialog pops up:
Figure 2: Erase Options 
Use tabbed views to adjust disk erasure options if necessary. Available options are:
If single disk is selected from Local Devices view, then exact area for the erase can be optionally specified:
Figure 3: Area selection for Disk Erase 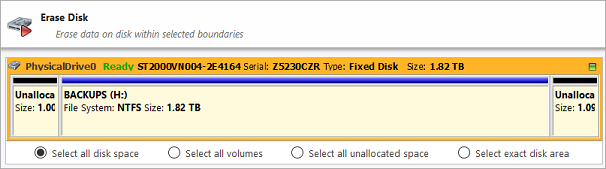
- Select all disk space
- Entire surface of the disk will be erased
- Select all volumes
- Select for erase the only disk space where the live volumes located
- Select all unallocated space
- Select for erase the only disk unallocated area (the space where no live volumes exist)
- Select exact disk area
- Allows you to use sliders on the visualization of your disk to select a particular range of sectors for erasure.
-
Observe progress
If Examine option is selected then disk examination starts first. Depending on examination results, disk erase runs as the second stage.
After starting erase a progress bar is displayed at the disk area. The progress bar represents the percentage of disk space being sanitized. As the procedure progresses the percentage increases and time left recalculates.
To stop erase process, click Stop at any time (via action toolbar, main menu or context menu).
Figure 4: Disk Erase Progress 
-
Verify erase completion
After erase is complete, the results (Success, Failed, Canceled) are displayed on top of the disks in different colors.
Figure 5: Erase Completed 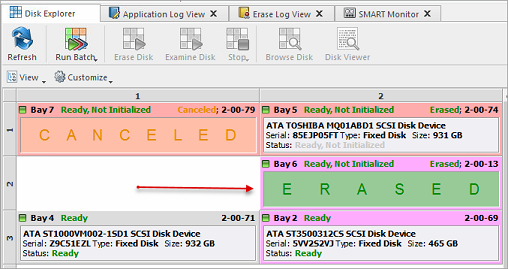
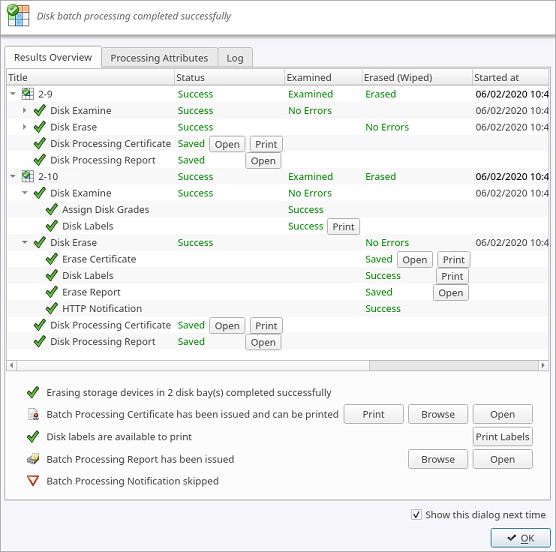
All erase events as well as erase results (Event Journal) stored to the internal database and can be exported to the external database or to the CSV format.